xNode的魔改记录 目录 一、接入Odin 二、修改Node的标题 三、替换DynamicPortList 四、修改Node创建菜单
想尝试一下制作一个可视化的剧情编辑器,于是翻阅了诸多文章后找到了开源的xNode。
xNode地址:https://github.com/Siccity/xNode
但是由于xNode的部分功能不是很符合我的需求,于是乎开始动手魔改,写下此文章以记录魔改过程。
一、接入Odin xNode虽然兼容Odin插件,但是其本身的Node和NodeGraph还是使用ScriptableObject进行序列化的。因此我们可以将其换为Odin里的SerializedScriptableObject,这样可以使Node和Graph更好的储存诸如Dictionary和Hashset之类的数据。
NodeGraph修改 打开NodeGraph.csScriptableObject替换成SerializedScriptableObject,并删除所有的[SerializeField]和[Serializable]即可。
1
2
3
4
5
6
7
8
9
10
11
12
13
using System;using System.Collections.Generic;using Sirenix.OdinInspector;using UnityEngine;namespace XNode { public abstract class NodeGraph : SerializedScriptableObject { [HideInInspector ] public List<Node> nodes = new List<Node>(); ...... } }
[HideInInspector]标签是为了让被Odin序列化的属性不会出现在面板上
Node修改 打开Node.cs文件ScriptableObject替换成SerializedScriptableObject,并删除[SerializeField]和[Serializable]
Node和NodeGraph不同的是,Node里原本使用了一个自建的NodePortDictionary来替代Dictionary,并为其自定义了序列化方法。但是我们使用SerializedScriptableObject的话,可以让Odin帮我们完成Dictionary的序列化。因此将ports变量的类型从NodePortDictionary改成Dictionary<string, NodePort>,并添加标签[OdinSerialize]
1
2
3
4
5
6
7
8
9
10
11
12
13
14
15
16
17
18
19
20
21
22
using System;using System.Collections.Generic;using Sirenix.OdinInspector;using UnityEngine;namespace XNode { public abstract class Node : SerializedScriptableObject { ...... [HideInInspector ] public NodeGraph graph; [HideInInspector ] public Vector2 position; [OdinSerialize ] [HideInInspector ] private Dictionary<string , NodePort> ports = new Dictionary<string , NodePort>(); ...... } }
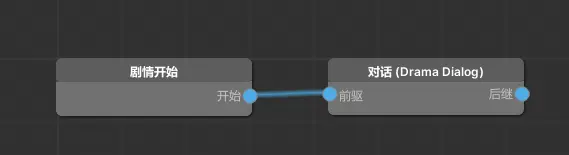
二、修改Node的标题 xNode里,Node默认使用的是name属性作为标题,而name属性则是由脚本名称自动生成的。虽然node可以进行rename,但是这样的显示方法还是不够友好。
打开Node.cs文件,找到#region Attributes部分,在里面添加新的Attribute
1 2 3 4 5 6 7 8 9 10 11 12 13 14 15 [AttributeUsage(AttributeTargets.Class, AllowMultiple = false) ] public class NodeTitleAttribute : Attribute { public string title; public bool allowCustomName; public NodeTitleAttribute (string title,bool allowCustomName = true { this .title = title; this .allowCustomName = allowCustomName; } }
打开NodeEditor.cs文件,找到public virtual void OnHeaderGUI()函数,修改如下:
1
2
3
4
5
6
7
8
9
10
11
12
13
14
15
16
17
18
19
20
21
22
23
24
25
26
27
28
private string title;private bool allowCustomName;public override void OnCreate (){ var nodeTitleAttribute = target.GetType().GetCustomAttribute<Node.NodeTitleAttribute>(); if (nodeTitleAttribute != null ) { title = nodeTitleAttribute.title; allowCustomName = nodeTitleAttribute.allowCustomName; } if (string .IsNullOrEmpty(title)) title = target.GetType().Name; Debug.Log("OnCreate" ); } public virtual void OnHeaderGUI (){ if (allowCustomName) GUILayout.Label($"{title} ({target.name} )" , NodeEditorResources.styles.nodeHeader, GUILayout.Height(30 )); else GUILayout.Label(title, NodeEditorResources.styles.nodeHeader, GUILayout.Height(30 )); }
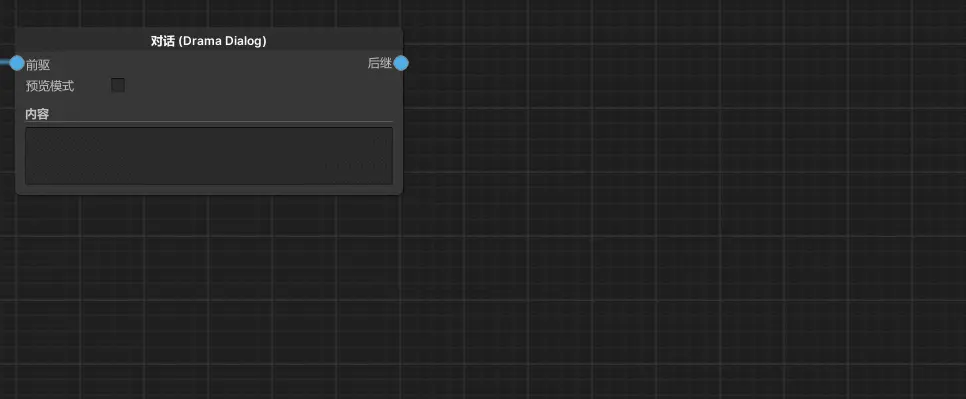
此时通过添加标签[NodeTitle("对话")]即可让Node显示自定义的标题:
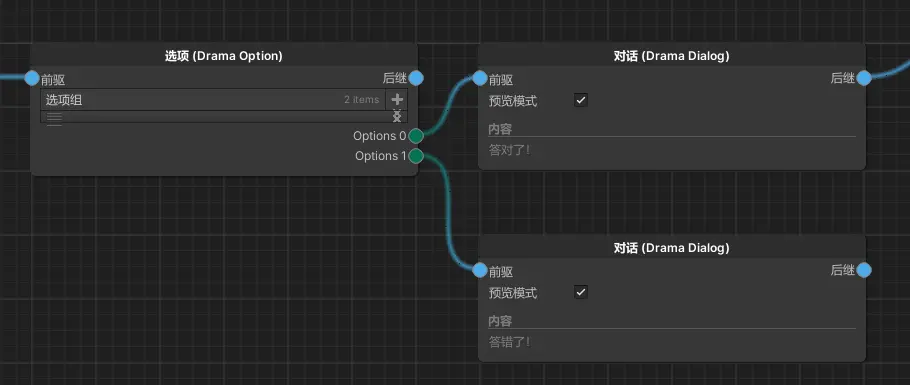
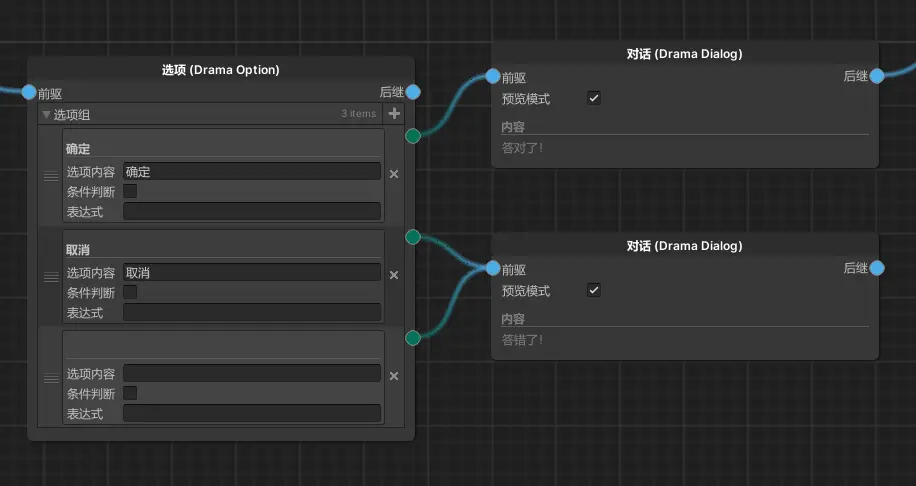
三、替换DynamicPortList xNode里有一个实用的功能,动态端口列表(dynamicPortList)。可以通过列表来自动生成对应的端口(port),一个列表元素对应一个port。使用方法也很简单,在例如List<string> options之类的字段前加上[Output(dynamicPortList = true)]或[Inputput(dynamicPortList = true)]即可。
但是xNode的DynamicPortList使用的是Unity自带的ReorderableList进行绘制的,不仅不是很美观,Odin相关的Attribute也全部失效了,如下图:
要想修改这种项的绘制,只能使用Unity原生的PropertyDrawer,但这样麻烦不说,还失去了我们接入Odin的初衷:高效、省时、省力。因此,最好还是想办法让其使用Odin的绘制流程来进行绘制。
在装上Odin插件后,xNode里会由OutputAttributeDrawer.cs来接管Output的绘制(Input同理)
首先找到OutputAttributeDrawer.cs里的DrawPropertyLayout(GUIContent label)函数,找到如下语句:
1
2
NodeEditorGUILayout.PropertyField(portPropoerty, label == null ? GUIContent.none : label, true , GUILayout.MinWidth(30 ));
在此处进行判断,非dynamicPortList的变量仍使用该语句渲染,而dynamicPortList则使用我们修改的方法:
1
2
3
4
5
6
7
8
9
10
11
if (Attribute.dynamicPortList){ CallNextDrawer(label); } else { NodeEditorGUILayout.PropertyField(portPropoerty, label == null ? GUIContent.none : label, true , GUILayout.MinWidth(30 )); }
其中,CallNextDrawer(label);是Odin的Draw里正常渲染的方法,我们使用该方法先把列表渲染出来。而NodeEditorGUILayout.DrawDynamicPortList将是我们需要使用的渲染动态port的新方法,由于目前还没有写,暂时先注释掉。
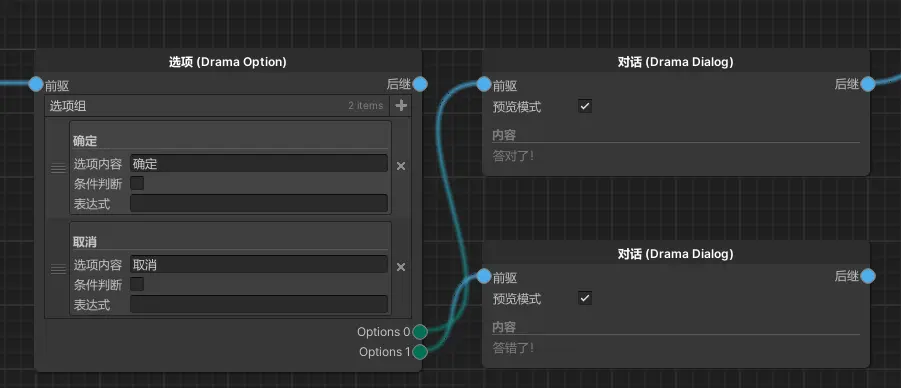
回到Unity,可以看到xNode里变成了如下样式。
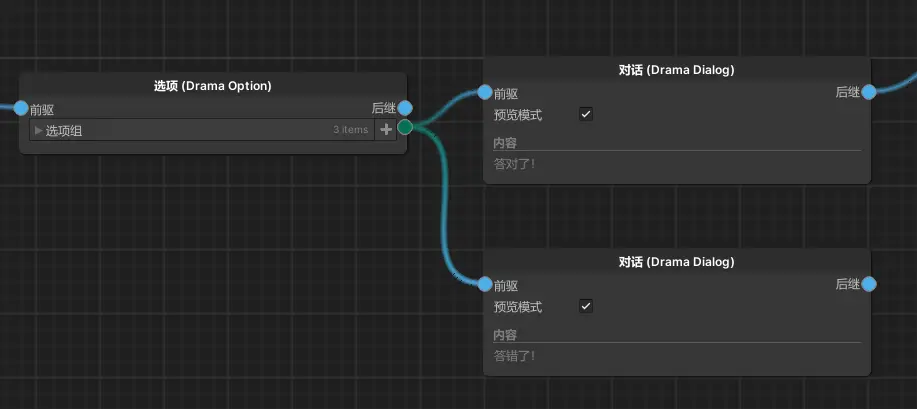
列表的端口单独独立出来了,且列表项没有被绘制。
首先解决列表项没有被绘制的问题,该处是因为Output标签对列表里的子元素也生效了,而因此子元素也受到了OutputAttributeDrawer的影响,没能被绘制出来。解决方法很简单,找到Node.cs里的OutputAttribute类,在前面加上[DontApplyToListElements]标签即可,如:
1 2 3 4 5 6 [AttributeUsage(AttributeTargets.Field) ] [DontApplyToListElements ] public class OutputAttribute : Attribute { ...... }
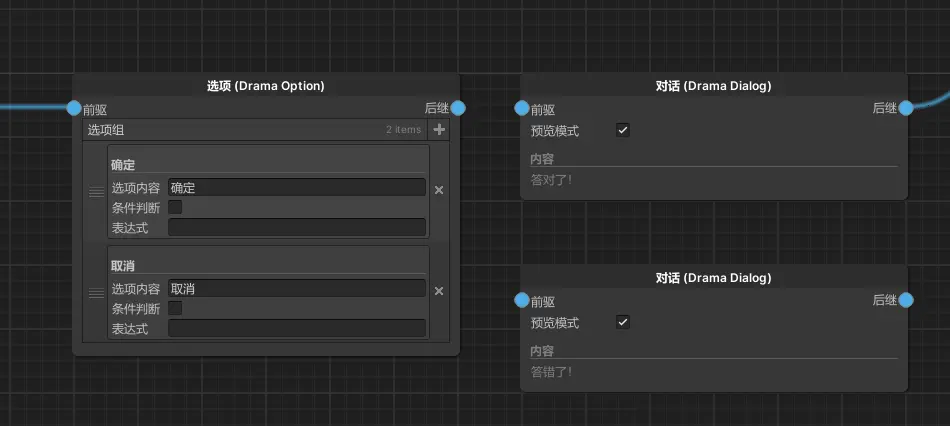
回到xNode,此时子元素已经被正确的绘制出来了,但是依然有独立的port被绘制在外面。
这是因为这些dynamic port没有被xnode的dynamicPortList绘制后,就会被自动以普通端口的形式进行绘制,具体逻辑在NodeEditor.cs的OnBodyGUI()函数里,如下:
1
2
3
4
5
foreach (XNode.NodePort dynamicPort in target.DynamicPorts) { if (NodeEditorGUILayout.IsDynamicPortListPort(dynamicPort)) continue ; NodeEditorGUILayout.PortField(dynamicPort); }
因此,我们只需要修改NodeEditorGUILayout.IsDynamicPortListPort的判断,让其将这些动态端口识别出来并跳过处理即可。
跳转到其函数位置,将其修改如下:
1
2
3
4
5
6
7
8
9
10
11
12
public static bool IsDynamicPortListPort (XNode.NodePort port ){ string [] parts = port.fieldName.Split(' ' ); if (parts.Length != 2 ) return false ; return true ; }
xNode里,动态端口的命名是 字段名+” “+序号,因此,我们只需要判断出来其中包含一个空格即可。如果有其他需求可自行修改。
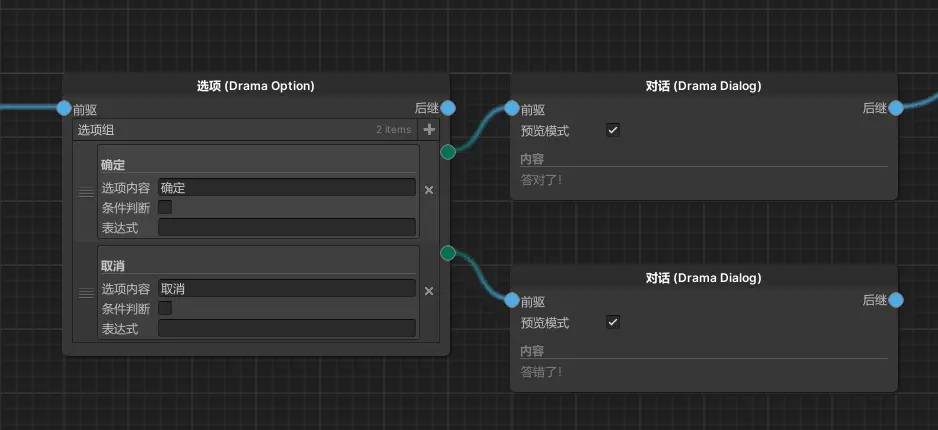
返回Unity,此时显示如下:
此时,我们需要开始添加自己的绘制Port的逻辑。返回到OutputAttributeDrawer.cs,取消之前注释的NodeEditorGUILayout.DrawDynamicPortList函数。
打开NodeEditorGUILayout.cs文件,在末尾添加以下函数:DrawDynamicPortList
1
2
3
4
5
6
7
8
9
10
11
12
13
14
15
16
17
18
19
public static void DrawDynamicPortList (InspectorProperty property,NodePort.IO portType, Node.ConnectionType connectionType,Node.TypeConstraint typeConstraint ){ Node node = property.Parent.ValueEntry.WeakSmartValue as Node; if (node == null ) return ; OnDynamicPortChange(property, node, portType, connectionType, typeConstraint); for (int i = 0 ; i < property.Children.Count; i++) { NodePort port = node.GetPort($"{property.Name} {i} " ); if (port == null ) return ; var propertyChild = property.Children.Get(i); DrawDynamicPortListItem(propertyChild, i,port); } }
OnDynamicPortChange
1
2
3
4
5
6
7
8
9
10
11
12
13
14
15
16
17
18
19
20
21
22
23
24
25
26
27
28
29
30
31
32
33
34
35
36
37
38
39
40
public static void OnDynamicPortChange (InspectorProperty property,Node node, NodePort.IO portType,Node.ConnectionType connectionType,Node.TypeConstraint typeConstraint ){ property.Update(); var dynamicDic = node.DynamicPorts.Where( port => { string [] names = port.fieldName.Split(' ' ); return names.Length == 2 && names[0 ] == property.Name; }).ToDictionary(port => port.fieldName); for (int i = 0 ; i < property.Children.Count; i++) { string portName = $"{property.Name} {i} " ; var propertyChildren = property.Children.Get(i); if (dynamicDic.ContainsKey(portName)) { dynamicDic.Remove(portName); } else { if (portType == NodePort.IO.Input) { node.AddDynamicInput(propertyChildren.ValueEntry.BaseValueType, connectionType, typeConstraint, portName); } else { node.AddDynamicOutput(propertyChildren.ValueEntry.BaseValueType, connectionType, typeConstraint, portName); } } } foreach (var nodePort in dynamicDic) { node.RemoveDynamicPort(nodePort.Value); } }
DrawDynamicPortListItem
1
2
3
4
5
6
7
8
9
10
11
12
13
14
15
16
17
18
19
public static void DrawDynamicPortListItem (InspectorProperty property,int index,NodePort port ){ Rect rect = property.LastDrawnValueRect; if (port.direction == NodePort.IO.Input) { rect.position = rect.position + new Vector2(-16 , 0 ); } else { rect.position = rect.position + new Vector2(rect.width+20 , 0 ); } rect.height = EditorGUIUtility.singleLineHeight; rect.size = new Vector2(16 , 16 ); var portPos = rect.center; NodeEditor.portPositions[port] = portPos; PortField(rect.position,port); }
DrawDynamicPortList函数负责收集Port的信息,并调用刷新函数和绘制函数。OnDynamicPortChange则是在List的大小变更后,对应调整Port的数量。DrawDynamicPortListItem负责渲染每一个子元素对应的port
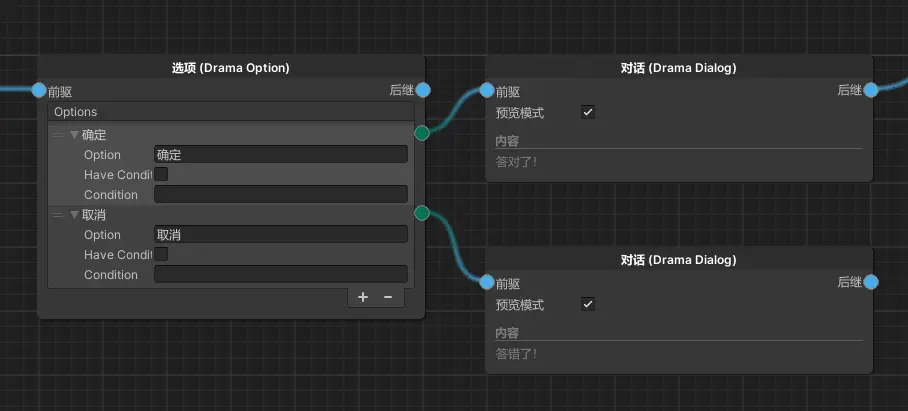
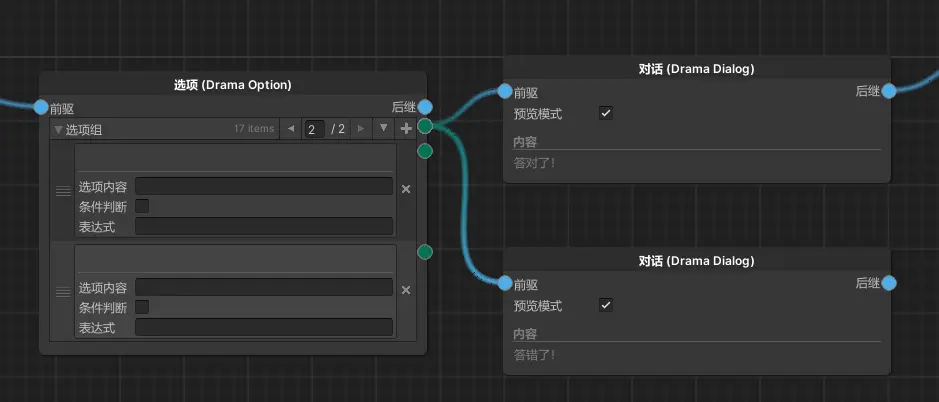
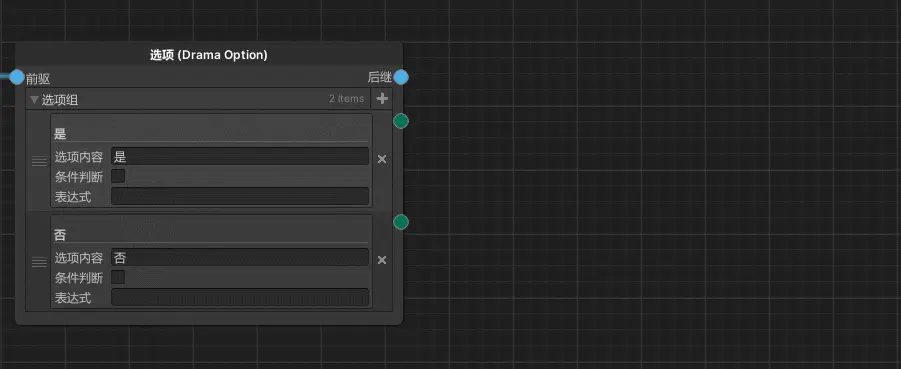
保存后,打开Unity,可以看到列表和对应的Port都能正常显示和使用了。
此处只修改了Output的Attribute,对于Input修改方法一样。
但是当前的List依然存在几个问题
调整List里的元素顺序后,Port并不会跟随一起变动
当拖拽、折叠、翻页时,由于rect获取异常,所有的端口都会堆积在左上角。
为此,还需要进一步的修改。
List元素变动时,修改Port 打开Node.cs文件,在Node类里插入以下内容
1 2 3 4 5 6 7 8 9 10 11 12 13 14 15 16 17 18 19 20 21 22 23 24 25 26 27 28 29 30 31 private int _lastDynamicPortIndex;public void OnDynamicPortListChange (InspectorProperty property,CollectionChangeInfo changeInfo, object value ){ if (changeInfo.ChangeType == CollectionChangeType.RemoveIndex) { _lastDynamicPortIndex = changeInfo.Index; } else if (changeInfo.ChangeType == CollectionChangeType.Insert) { string fieldName = property.Name; if (changeInfo.Index > _lastDynamicPortIndex) { for (int i = _lastDynamicPortIndex; i < changeInfo.Index; ++i) { NodePort port = GetPort(fieldName + " " + i); NodePort nextPort = GetPort(fieldName + " " + (i + 1 )); port.SwapConnections(nextPort); } } else { for (int i = _lastDynamicPortIndex; i > changeInfo.Index; --i) { NodePort port = GetPort(fieldName + " " + i); NodePort nextPort = GetPort(fieldName + " " + (i - 1 )); port.SwapConnections(nextPort); } } } }
随后回到添加了dynamicPortList的变量边上,加入标签[OnCollectionChanged(After = "OnDynamicPortListChange")]
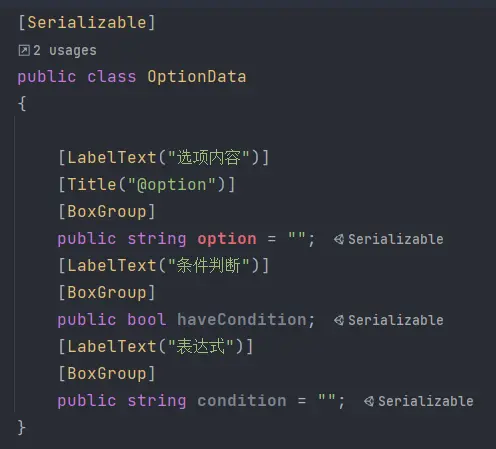
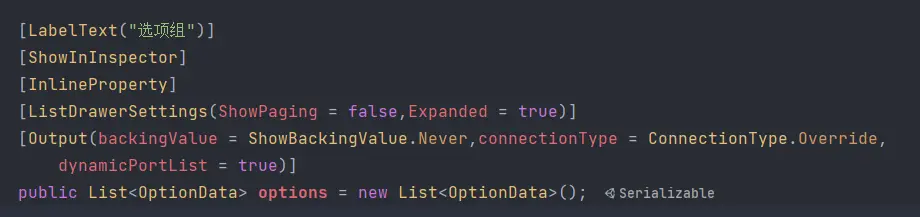
1 2 3 4 5 [Output(backingValue = ShowBackingValue.Never, connectionType = ConnectionType.Override, dynamicPortList = true) ][OnCollectionChanged(After = "OnDynamicPortListChange" ) ] public List<OptionData> options = new List<OptionData>();
该标签会在List的面板上发生列表变动后,调用Node基类里的OnDynamicPortListChange函数回调。
解决异常渲染的Port 找到之前在NodeEditorGUILayout类里添加的DrawDynamicPortListItem函数,将其修改为如下
1
2
3
4
5
6
7
8
9
10
11
12
13
14
15
16
17
18
19
20
21
22
23
24
25
26
27
28
29
30
31
32
33
34
35
36
37
public static void DrawDynamicPortListItem (InspectorProperty property,int index,NodePort port ){ Rect rect = property.LastDrawnValueRect; bool isShowing = rect != Rect.zero && property.Parent.State.Expanded; if (isShowing) { if (port.direction == NodePort.IO.Input) { rect.position = rect.position + new Vector2(-16 , 0 ); } else { rect.position = rect.position + new Vector2(rect.width+20 , 0 ); } } else { rect = property.Parent.LastDrawnValueRect; if (port.direction == NodePort.IO.Input) { rect.position = rect.position + new Vector2(0 , 0 ); } else { rect.position = rect.position + new Vector2(rect.width, 0 ); } } rect.height = EditorGUIUtility.singleLineHeight; rect.size = new Vector2(16 , 16 ); var portPos = rect.center; NodeEditor.portPositions[port] = portPos; PortField(rect.position,port); }
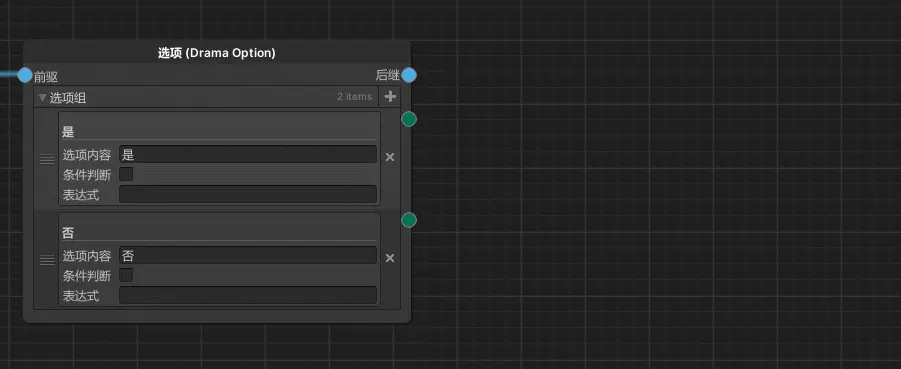
这样Port在List折叠或翻页时,也能显示在正确的位置上了。
四、修改Node创建菜单 xNode的Graph界面,右键菜单默认是显示所有的Node,但是当Node很多的时候,查找起来相当的不方便。因此,我们可以使用Odin的Selector来替代Node的创建菜单。
添加新的Node选择器 打开NodeGraphEditor.cs,找到AddContextMenuItems函数,该函数是用于控制右键菜单弹出时添加的内容。
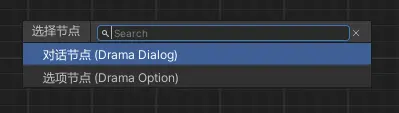
1
2
3
4
5
6
7
8
9
10
11
12
13
14
15
16
17
18
19
20
21
22
23
24
25
26
27
28
29
30
31
32
33
34
35
36
37
38
39
40
41
42
43
44
45
46
47
48
49
50
51
52
53
54
55
56
57
58
59
60
61
62
63
64
65
66
67
68
69
public virtual void AddContextMenuItems (GenericMenu menu, Type compatibleType = null , XNode.NodePort.IO direction = XNode.NodePort.IO.Input ){ var mousePosition = Event.current.mousePosition; Vector2 pos = NodeEditorWindow.current.WindowToGridPosition(mousePosition); var nodesCreator = GetGenericSelector(compatibleType, direction, pos); menu.AddItem(new GUIContent("创建节点" ),false , () => { nodesCreator.ShowInPopup(mousePosition); }); menu.AddSeparator("" ); if (NodeEditorWindow.copyBuffer != null && NodeEditorWindow.copyBuffer.Length > 0 ) menu.AddItem(new GUIContent("Paste" ), false , () => NodeEditorWindow.current.PasteNodes(pos)); else menu.AddDisabledItem(new GUIContent("粘贴" )); menu.AddItem(new GUIContent("偏好设置" ), false , () => NodeEditorReflection.OpenPreferences()); menu.AddCustomContextMenuItems(target); } public GenericSelector<Type> GetGenericSelector (Type compatibleType, NodePort.IO direction, Vector2 pos ){ Type[] nodeTypes; if (compatibleType != null && NodeEditorPreferences.GetSettings().createFilter) { nodeTypes = NodeEditorUtilities .GetCompatibleNodesTypes(NodeEditorReflection.nodeTypes, compatibleType, direction) .OrderBy(GetNodeMenuOrder).ToArray(); } else { nodeTypes = NodeEditorReflection.nodeTypes.OrderBy(GetNodeMenuOrder).ToArray(); } Dictionary<Type, string > typesCache = new Dictionary<Type, string >(); for (int i = 0 ; i < nodeTypes.Length; i++) { Type type = nodeTypes[i]; string path = GetNodeMenuName(type); if (string .IsNullOrEmpty(path)) continue ; XNode.Node.DisallowMultipleNodesAttribute disallowAttrib; bool disallowed = false ; if (NodeEditorUtilities.GetAttrib(type, out disallowAttrib)) { int typeCount = target.nodes.Count(x => x.GetType() == type); if (typeCount >= disallowAttrib.max) disallowed = true ; } if (!disallowed) { typesCache.Add(type, $"{path} ({NodeEditorUtilities.NodeDefaultName(type)} )" ); } } GenericSelector<Type> nodesCreator = new GenericSelector<Type>("选择节点" , false , x => typesCache[x], typesCache.Keys); nodesCreator.SelectionTree.Config.DrawSearchToolbar = true ; nodesCreator.SelectionTree.Config.AutoFocusSearchBar = true ; nodesCreator.SelectionTree.Config.ConfirmSelectionOnDoubleClick = true ; nodesCreator.SelectionConfirmed += col => { XNode.Node node = CreateNode(col.FirstOrDefault(), pos); NodeEditorWindow.current.AutoConnect(node); }; return nodesCreator; }
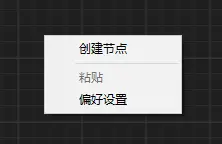
此时,Graph界面里,右键会变成如下样式:
而点击创建节点 后,会出现如下菜单:
此时,初步的改造已经完成了。但是,以往右键直接打开创建菜单的方式变成了如今的两步点击,是很不方便的。因此我们还可以进行进一步的优化:
添加快捷键 打开NodeEditorAction.cs,搜索case EventType.KeyDown:,在该case语句的末尾,添加新的按键判断:
1
2
3
4
5
6
7
8
9
10
11
12
13
14
15
16
17
18
19
20
21
22
23
24
25
26
27
28
29
30
case EventType.KeyDown: if (EditorGUIUtility.editingTextField || GUIUtility.keyboardControl != 0 ) break ; else if (e.keyCode == KeyCode.F) Home(); if (NodeEditorUtilities.IsMac()) { if (e.keyCode == KeyCode.Return) RenameSelectedNode(); } else { if (e.keyCode == KeyCode.F2) RenameSelectedNode(); } if (e.keyCode == KeyCode.A) { if (Selection.objects.Any(x => graph.nodes.Contains(x as XNode.Node))) { foreach (XNode.Node node in graph.nodes) { DeselectNode(node); } } else { foreach (XNode.Node node in graph.nodes) { SelectNode(node, true ); } } Repaint(); } if (e.keyCode == KeyCode.Space) { var mousePosition = e.mousePosition; Vector2 pos = WindowToGridPosition(mousePosition); var nodesCreator = graphEditor.GetGenericSelector(null , NodePort.IO.Input, pos); nodesCreator.ShowInPopup(mousePosition); } break ;
回到xNode里,此时按Space键能快速打开节点选择器
修改拖拽端口时弹出的菜单 搜索else if (draggedOutputTarget == null && NodeEditorPreferences.GetSettings().dragToCreate && autoConnectOutput != null)
1
2
3
4
5
6
7
8
9
else if (draggedOutputTarget == null && NodeEditorPreferences.GetSettings().dragToCreate && autoConnectOutput != null ) { var mousePosition = e.mousePosition; Vector2 pos = WindowToGridPosition(mousePosition); var nodesCreator = graphEditor.GetGenericSelector(draggedOutput.ValueType, NodePort.IO.Input, pos); nodesCreator.ShowInPopup(mousePosition); }
这样在拖拽端口后,可以快速打开节点选择器。
修改拖拽端口创建节点时的逻辑判断 在测试DynamicPortList时,我发现即使Input端口的TypeConstraint已经设置成了TypeConstraint.None,但是在拖拽时依然无法弹出可选的节点列表,如图:
分析代码时,发现是由于判断端口是否能连接的函数HasCompatiblePortType里,没有判断Attribute的typeConstraint所导致的。
打开NodeEditorUtilities.cs文件,找到HasCompatiblePortType方法,将其替换如下:
1
2
3
4
5
6
7
8
9
10
11
12
13
14
15
16
17
18
19
20
21
22
23
24
25
26
27
28
29
30
31
public static bool HasCompatiblePortType (Type nodeType, Type compatibleType, XNode.NodePort.IO direction = XNode.NodePort.IO.Input ){ Type findType = typeof (XNode.Node.InputAttribute); if (direction == XNode.NodePort.IO.Output) findType = typeof (XNode.Node.OutputAttribute); foreach (FieldInfo f in XNode.NodeDataCache.GetNodeFields(nodeType)) { var portAttribute = f.GetCustomAttributes(findType, false ).FirstOrDefault(); if (portAttribute != null ) { switch (portAttribute) { case Node.InputAttribute inputAttribute: if (inputAttribute.typeConstraint == Node.TypeConstraint.None) return true ; break ; case Node.OutputAttribute outputAttribute: if (outputAttribute.typeConstraint == Node.TypeConstraint.None) return true ; break ; } if (IsCastableTo(f.FieldType, compatibleType)) { return true ; } } } return false ; }
我们新增了端口特性的判断后,便可以通过拖拽来创建并连接端口类型不同的节点了。